Skip to content
adatum
  • Home
  •  About adatum
  •  Learn Azure Bicep
  •  SCOM Web API
DevOps

Moving to Azure and team requirements

  • 08/12/201907/01/2025
  • by Martin Ehrnst

Around ten years ago, traditional IT-professionals started to talk about losing their jobs due to the public cloud.
It’s no secret that people actually have lost their job in the last years. But I’m pretty confident those who managed to make some changes kept their job or got a better position in another company.

The specialists

In my job, working for a service provider, I have seen the change from many angles. Ten years ago, we helped companies with traditional IT infrastructure. Smaller companies running physical servers On-Premises, or larger companies with an ESX stack in their office. They were all managed by our specialists. Specialists on network devices knew everything about the hardware, and how to place them in the racks.
The server team was Windows Server specialists, but also knew ‘everything’ about storage. Disks, SAN, etc.

Cultural changes

Many companies hire new people to handle the infrastructure on Azure or other public and private clouds. But I think that is a bad idea. Investment in making cultural changes should be the main priority. Moving to Azure introduces a new platform and products to your ecosystem, but the knowledge from traditional infrastructure is still very valid. Subnetting and firewalls still exist, as do operating system patches and failed backups. Your existing team already knows your infrastructure, making them the best fit to manage it on Azure as well.

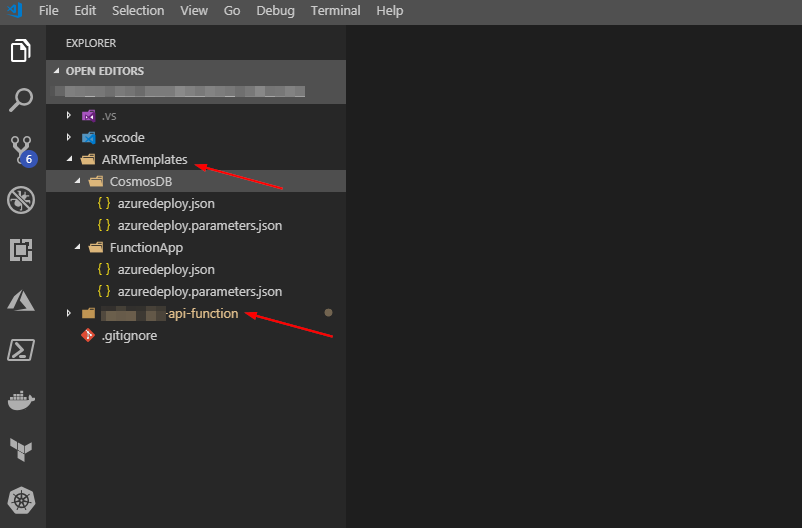
Moving to Azure or any other cloud will require a code-first approach to manage and deploy the infrastructure. Git, Pipelines and pull requests is now as normal as calculating subnets.

Team requirements

The team required to move your infrastructure, and successfully manage it should be familiar with the DevOps methodology, and how to define the infrastructure in code.

Another thing to keep in mind is that platform knowledge is very important for everyone managing the workloads running in Azure and other cloud platforms.
Let’s take a look at monitoring. In order to have a good monitoring platform, you require a few basics like alerting. Alerting is built into every monitoring platform out there, and is the foundation of monitoring. But alerts need to be handled. Hopefully, you have killed email alerts already, and you have other routines in place, like an ITSM platform or maybe your alert remediation is a PowerShell script.
To have an alert automatically remediated in Azure Monitor, you will need to learn a new product like Azure Functions to run your PowerShell script.

PS: Microsoft replaced SCOM for Azure monitor, driven by cultural changes and DevOps

Modern IT-Pro’s

At its core, IT hasn’t changed that much. It is still zero’s and one’s. The cultural changes and the desire to learn new technology and work methodology is, in my opinion, the biggest challenge.
The amount of pressure to adopt a new way of work and to learn new technology is not a joke.
If you can call your self a modern IT pro, you deserve many high fives, and you can be very proud of what you have achieved.

Share this:

  • Click to share on LinkedIn (Opens in new window) LinkedIn
  • Click to share on X (Opens in new window) X
  • Click to share on Reddit (Opens in new window) Reddit
Azure

Azure AD authentication in Azure Functions

  • 28/03/201907/01/2025
  • by Martin Ehrnst

Ever had the need to enable Azure Active Directory authentication in Azure Functions? In a recent project, I wanted to use Azure Functions, and I wanted both system-to-system authentication, as well as user-based. As Azure Functions is a part of the app services in Azure. It shares many of the same features. Authentication is one of them.

Enable authentication

The scope for this blog post is not to show you how to build an Azure function, but to enable Azure AD authentication on it. You can add auth to your existing function or create a new one using your method of choice. For simplicity, I will show the process of using the Azure portal.

To enable authentication in Azure Function. Navigate to “Authentication/authorization”. This will open a series of blades which guides you through the process.

If you’re not familiar with Azure AD and custom application registrations, I recommend that you use the Express option. This will create the needed application in AAD for you.

Enable azure ad authentication in azure function

Enable azure ad authentication in azure function

Enable azure ad authentication in azure function

Change to anonymous authentication

By default Azure Function uses something called “Function authentication” This is where all your requests have a code parameter at the end of the URL.

https://my-function-app.azurewebsites.net/api/function-name?code=xyzx-zyxx...

We want to have Azure AD perform authentication and authorization, and not the function itself.

Within the GUI, it’s just a flick of a switch. If you are developing locally, using C# you typically do this:

public static HttpResponseMessage (run [HttpTrigger( AuthorizationLevel.Anonymous)] HttpRequestmessage request) { logic }

Enable user assignment

After changing the authorization level and enable AAD authentication,
all users in your organization will automatically have access. If you want more granular control over who has access to your application, you should enable user assignment.

To enable user assignment. Navigate to enterprise application under AAD, and look up the app created by the wizard. The enterprise app is the service principal representing the application you created. Your Azure Function.

Under properties, find the swith for user assignment and turn it on. Navigate to your function URL and see if it works, meaning access denied.

Later add your own user and verify authentication works through Azure AD.

If you want other applications (clients) to call your function, you will have to assign them API access. The same way you give access to for example Microsoft Graph API, you will find your custom application as well.

This will not work right away – By default, there are no application roles assigned. Only delegated permissions. For client authentication to work, you will need to add custom roles to the app representing your Azure Function. It is not difficult, but I used too much time finding it out. Microsoft has it documented here

Authenticate with code

Chances are that your azure function is not a graphical website. Therefore I assume you want to authenticate using code. Either with your own user, or with a separate application/secret combination (app credentials).

The great thing about this is that it works just as any other Microsoft/Azure APIs. If you know how to get a token from Microsoft, you can use the same techniques against your function. My example below show how to retrieve a token for our azure function, and use that bearer token against the function. I use a client application in this scenario.

Summary

This feature is great. I consider my self as a modern IT operations guy. And operations role these days requires more coding and scripting. It is super easy to expose things on the internet. But remember, it might also be just as easy to secure.
I have no idea on how to implement a authentication layer. And if i can use one of the best, i’m all aboard.

Share this:

  • Click to share on LinkedIn (Opens in new window) LinkedIn
  • Click to share on X (Opens in new window) X
  • Click to share on Reddit (Opens in new window) Reddit
Automation

Using Azure pipelines to deploy ARM templates

  • 27/02/201907/01/2025
  • by Martin Ehrnst

There are many reasons that you would use an Azure Resource Manager (ARM) template to deploy your Azure resources. And there’s equally many ways to deploy this kind of template.

For simple one time deployments of Azure resources I tend to use PowerShell or AZ CLI, but lately I have ben busy trying to create a web api based on Azure Functions using C# and .NET core. For those who know me, that’s not straight foreward.
To make things even more diffucult, I wanted to use Azure DevOps and Pipelines to build and push my code. In order to do that, I had to have some infrastructure in place, so why wouldn’t I use Azure Pipelines to deploy the ARM template as well?

Create ARM template

In order to deploy Azure Resource Manager templates, you will need to create one. ARM templates are based on Json and follows a schema. This schema or rule set if you like, defines how you must structure your template.

There are two forms of deployment options. At a resource group level (most common) and subscription level deployment. Both uses the same kind of Json language but have two different schemas. You’ll find the current resource group deployment schema here (no need to read :))

If you are unfamiliar with Json and ARM templates I recommend you to read Microsofts official documentation and getting started guide which will show how you can find the template from an existing deployment or create a new.

For reference, this is a simple template to deploy a web app, that I copied from Microsofts GitHub repo with a bunch of templates to get you started.

Adding ARM template along with your code

As I already mentioned deploy ARM template in a pipeline makes sense in many ways, especially if you have developed an application. This way you can control the infrastructure along side the code.

My Azure Function uses Cosmos DB and Key Vault as parts of it’s infrastructure. It is all developed in Visual Studio Code, and the whole thing is cutting edge for an old operations guy like me.

In the picture below you’ll see that I have structured my project in to two subfolders. One is holding the ARM templates, and the other one is for the acutal functions code. I did this so i would be able to chose artifacts from the build process in Azure DevOps pipelines. There might be a better way, but when i had everything in the same folder the templates was packed with the code and not available in deployment pipeline.

vscode function project with arm template folder

Set up the build pipeline

Not long ago I learned that there are two types of pipelines. Build pipelines and release pipelines. Build is used to pack up or actually build the application (same as pressing f5 in Visual Studio). Where release are used for pushing the application on to your infrastructure (and deploy the infra).

For reference. In Azure DevOps, my folder structure looks exactly the same

Next move over to pipelines and create a new release pipeline. From here chose your repository (I use Azure repos).

After chosing your repo, ou can chose to start from a template. My project is a .NET core application and I had no idea what was needed to build that, so a template worked nicely. Here you can chose what’s best for you’re project. The important pieces from an ARM template perspective comes in the next steps

Start out by filling in the obvious. A name and a server to do the build. In my case i run with Azure hosted 2017. In an on premises environment I would use private servers.

Add your templates as build artifacts

What you will need to do next is to take those Json files in your arm template catalog, and make them available as part of the build. You will have to add in a “Copy files” step and fill in a few properties. Pay attention to where I chose the source folder and the destination folder which have a variable reference, $(build.artifactstagingdirectory)/arm

Now. Hit save and queue. This will save your new (or edited pipeline) and start a build of your project.

By now you should also have a build running, and if you’re like me, exploring new stuff, you get used to this

Axure pipelines failed build publish

In this particular error. The publish task for .NET core is missing www root folder. By trial and error I found that I had to make a few changes to my build pipeline. This is not a prerequisite for running ARM templates with Azure pipelines, but i figured I should add in everything I had to do for this project, both for my reference and for yours if needed.

I removed “publish web projects” as i don’t have an ordinary web project, but an Azure function based API.

When you remove this tick, the task will refere to your project file (.CSPROJ).


Here i should give a shout out to my trusty colleague Emil Kjelsrud for helping out, once again.

Hit save and queue once again. Voila!

Configure the release pipeline with ARM templates

When your build is successful, we’re close to launch our application on to Azure. We do that by configuring a release pipeline. It is possible to combine the two, but I like them separated.

Under Pipelines > Releases hit new. A new wizard will pop up. Either chose one that fit your purpose, or start from scratch. In my case I chose to start with app service deployment. One of the first things you notice is “some settings need attention.”

Required settings in this context are the connection to your Azure environment and subscription. You will need to configure this in order to continue. There are several methods available for connecting your pipelines to Azure. I have my pipeline deploying resources in a tenant and subscription that my user does not have access to. That configuration requires a SPN/App registration in Azure AD with the correct permissions.

After configuring your connection. Modify your pipeline by adding in your required Azure Resource Group Deployment tasks. Here comes a few important bits. Prior to setting up my pipeline, I have a resource group created already. If you want to have the resource group created during deployment. You can use the Azure CLI or Azure powershell tasks (or a template) to do so.

Continue to fill in the required parameters. Remember that I separated my application code and the templates in to separate folders? This is why. I can now chose from the same artifact what i want to deploy, as the build pipeline have them available in their respective folders. Chose the template and your parameters file.

In this Azure DevOps environment we have an extension available that parses all outputs from your ARM templates. This way I can use variables from the previous step in my app service deployment. If you dont have this extension available, you can achieve the same result using PowerShell

Create the release

You’re pipeline is now complete. Save and create a release, the pipeline should now pick up the latest build and deploy your code to Azure. You can follow the whole process in Azure, under resource group > deployment and in Azure DevOps

After a few minutes (or seconds) depending on your configuration, you should have both your infrastructure and the actual application available.

Final thoughts

While I understand many of the concepts around infrastructure as code, continious integration and so on, I don’t always use the correct terms, so thank you for reading.

I hope you also have a greater understanding around the concepts, and also how you can utilize the possibilities available. My thoughts working with projects like this is always bound to the operational side. I know I’m going to use more ARM templates in Azure Pipelines, but probably not along side the actual code, as that’s not my day-to-day work. Again, I see my self working more and more with these Dev tools, and thats why I like to say that this is how we do modern Ops.

I leared a few more tips and tricks during this small project, so expect a few more posts soon.

Share this:

  • Click to share on LinkedIn (Opens in new window) LinkedIn
  • Click to share on X (Opens in new window) X
  • Click to share on Reddit (Opens in new window) Reddit

Posts pagination

1 2 3 4 5 6

Popular blog posts

  • Azure Application registrations, Enterprise Apps, and managed identities
  • Azure token from a custom app registration
  • Creating Azure AD Application using Powershell
  • Migrate from Azure DevOps to GitHub - what you need to know
  • Azure AD authentication in Azure Functions

Categories

Automation Azure Azure Active Directory Azure Bicep Azure DevOps Azure Functions Azure Lighthouse Azure Logic Apps Azure Monitor Azure Policy Community Conferences CSP Monitoring DevOps GitHub Guest blogs Infrastructure As Code Kubernetes Microsoft CSP MPAuthoring OMS Operations Manager Podcast Powershell Uncategorised Windows Admin Center Windows Server

Follow Martin Ehrnst

  • X
  • LinkedIn

RSS feed RSS - Posts

RSS feed RSS - Comments

Microsoft Azure MVP

Martin Ehrnst Microsoft Azure MVP
Adatum.no use cookies to ensure that we give you the best experience on our website. If you continue to use this site we will assume that you are happy with it. Cookie Policy
Theme by Colorlib Powered by WordPress